|
|
|
||
 |
|
||
|
|
|
||
|
|
|||
|
|
|
|
|
|
|---|
| |||||||||||||||||||
|
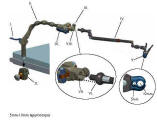
Laparoscope Support - Camera Arm – Laprostat
Designed to provide an extra hand, the Laparostat conveniently holds a laparoscopic camera static, yet allows the surgeon to manipulate it by hand with speed and accuracy. It can be quickly connected or disconnected to a laparoscope and does not restrict the range of motion. This innovative product is low maintenance and easy-to-use.
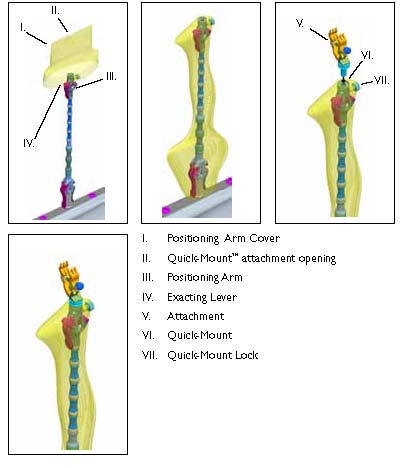
The Laparostat connects to the end of the Assist Positioning Arm and holds the laparoscope static in any position. The clamp has two notches sized for quickly grasping or releasing standard 5mm or 10mm diameter laparoscopes. The Laparostat functions as a mini-arm and allows complete range of possible motions for the scope SeeDOS Ltd - Laparastat Kit User Instructions - pdf SeeDOS Ltd - Positioning Arm Cover - pdf The Laparostat holds a laparoscope and attaches into positioning arm : SeeDOS Code 811-060 : Laparostat Kit including : Positioning Arm S ( 1 ) Rail Adapter- 90 degrees ( 1 ) Laparostat ( 1 ) Disposable Positioning Arm Covers ( 24 ) SeeDOS Code 610-946 : Disposable positioning arm covers ( pack of 24 ) : Sterile 25.4 tapered to 5.1 x 147cm (10" tapered to 2" x 58" ) telescopically-folded CIV-Flex cover positioning arm cover.
The Laparostat holds a laparoscope and attaches into positioning arm.
Always place a cover over device to protect patients and users from cross-contamination.
Optional Starting Positions :
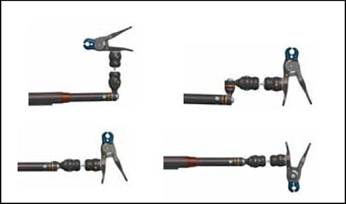 9. Attach clamp to laparoscope as close to camera body as possible, taking care to avoid puncturing cover. Ensure laparoscope is secure.
Cleaning and Disinfecting
1. After each use, discard single-use, disposable components. 2. Wipe all surfaces with common germicidal or antiseptic wipe, such as alcohol. Always place a cover over device to protect patients and users from cross-contamination. SeeDOS Ltd - Laparastat Kit User Instructions - pdf SeeDOS Ltd - Positioning Arm Cover - pdf
|